

0
Owner's of the Cisco Systems Switch Cisco Nexus Switch gave it a score of 0 out of 5. Here's how the scores stacked up:
Send document comments to nexus7k-docfeedback@cisco.com
3-28
Cisco Nexus 7000 Series Hardware Installation and Reference Guide
OL-18634-01
Chapter 3 Installing a Cisco Nexus 7018 Chassis
Installing the Front Door and Air Intake Frame
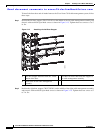
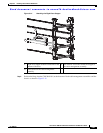
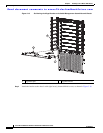
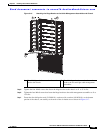
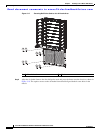
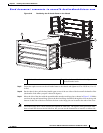
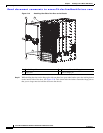
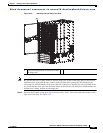
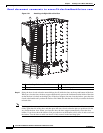
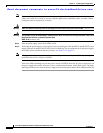
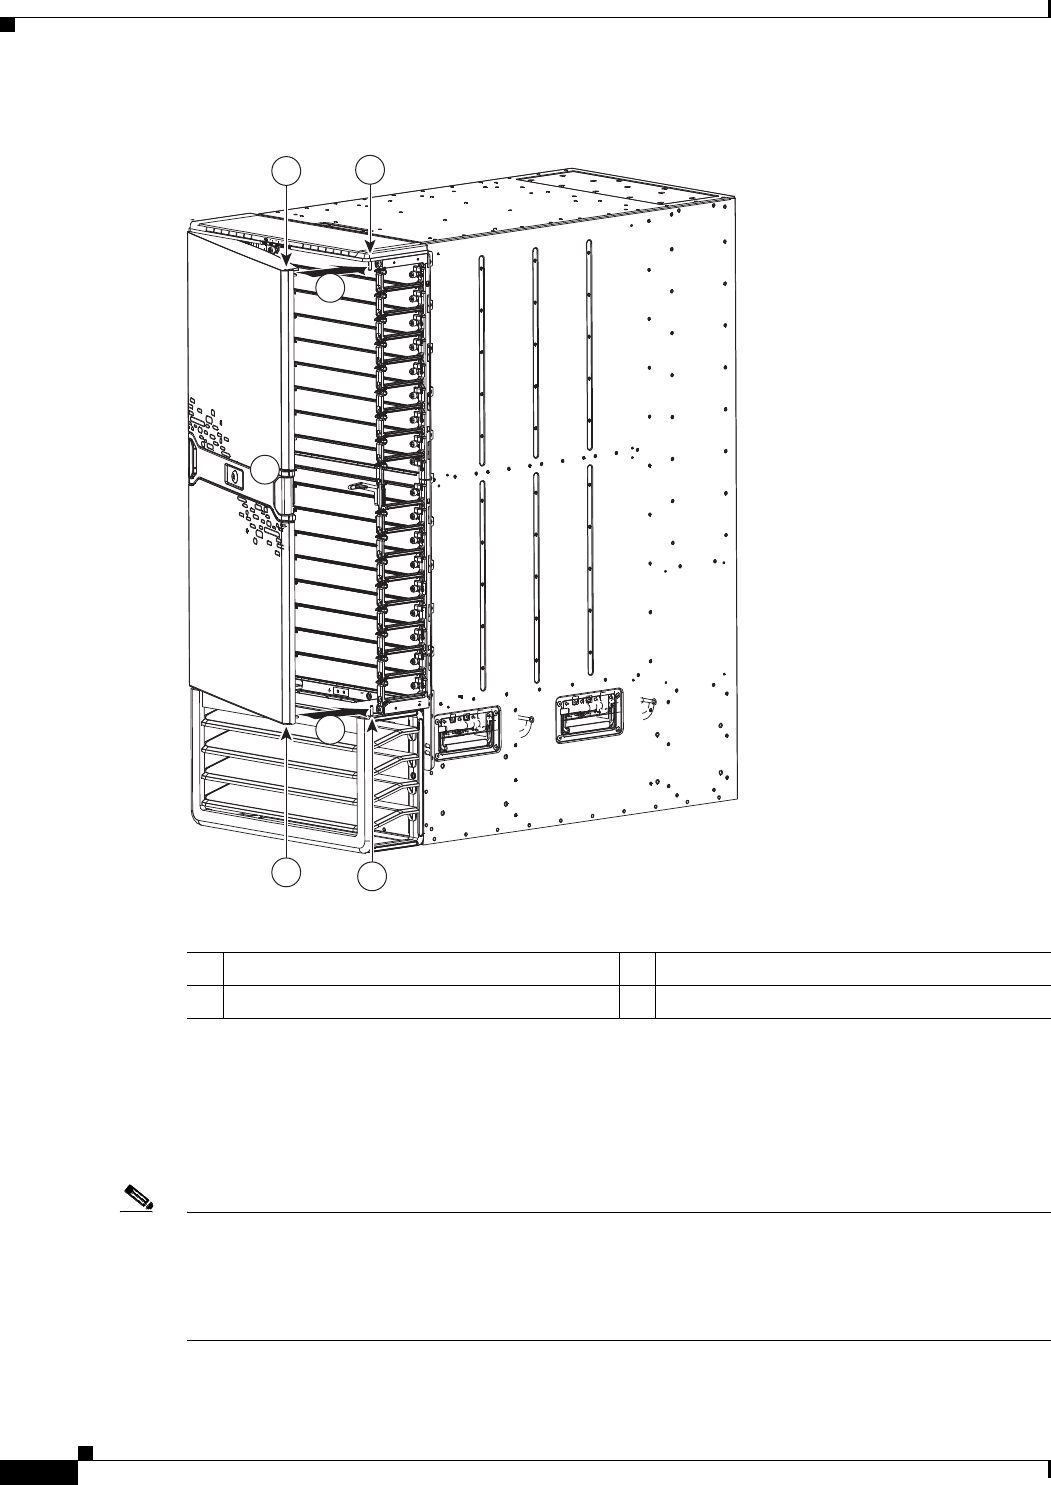
Figure 3-21 Attaching the Right Side of the Door
Step 14 Swing the door closed so that the unused hinge pins fit inside the slots on the top and bottom of the door.
When you close the door, the door stopper automatically presses the lock button on the inside of the door
so that the door is locked on the hinge pins. If the door stopper does not close the latches, press the door
closed at the handle until you hear the latches click. Make sure that the door is fully secured to the frames
on both sides.
Note If a hinge pin is not secured behind a door latch, open the door handle for that side of the door until it
clicks, open that side of the door, and then press the door closed so that the pins are positioned all the
way inside the door slots. When you close the door, the door stopper automatically closes the door
latches. If you do not hear the latches click, press the door at the handle to fully close it and to activate
the latches. Test the door to make sure that it is fully secured to the four hinge pins.
192233
4
4
1
2
2
3
3
1 Door handle pulled out until it clicks 2 Swing the door closed
3 Hinge pins 4 Slots for hinge pins


Find Your Products By Category
Please Login
