

0
Owner's of the Cisco Systems Switch Cisco Nexus Switch gave it a score of 0 out of 5. Here's how the scores stacked up:

Send document comments to nexus7k-docfeedback@cisco.com
3-12
Cisco Nexus 7000 Series Hardware Installation and Reference Guide
OL-18634-01
Chapter 3 Installing a Cisco Nexus 7018 Chassis
Grounding the Cisco Nexus 7018 Chassis
Connecting the System Ground
After you have moved the chassis into the rack or cabinet, you are ready to connect the system to the
earth ground. After you ground the chassis, you can ground your ESD wrist strap by connecting it to the
chassis.
To connect the system ground to the earth ground, follow these steps:
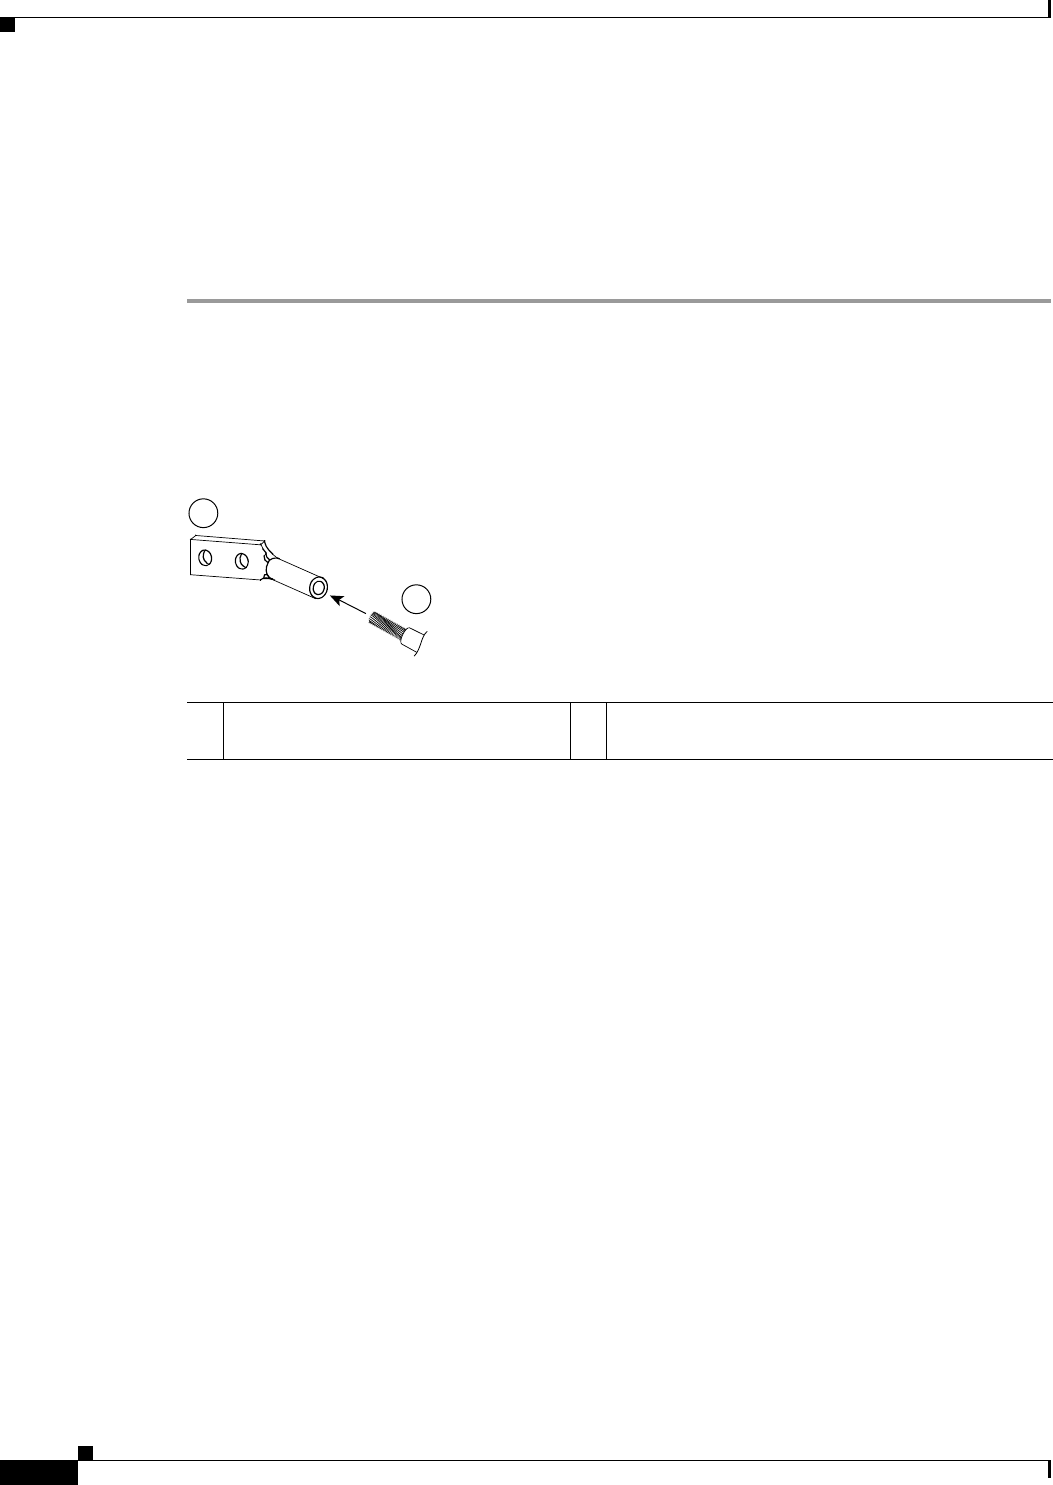
Step 1 Use a wire-stripping tool to remove approximately 0.75 inch (19 mm) of the covering from the end of
the grounding wire.
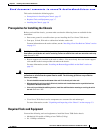
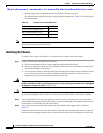
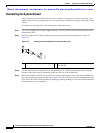
Step 2 Insert the stripped end of the grounding wire into the open end of the grounding lug as shown in
Figure 3-5.
Figure 3-5 Inserting the Grounding Wire in the Grounding Lug
Step 3 Use the crimping tool to crimp the lug to the grounding wire. Verify that the ground wire is securely
attached to the ground lug by attempting to pull the wire out of the crimped lug.
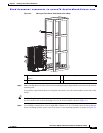
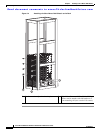
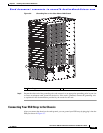
Step 4 Remove the adhesive label from one of the two system grounding pads, and secure the grounding wire
lug to the grounding pad with two M4 screws.
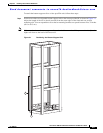
Figure 3-6 shows the location of the grounding pad on the
front side of the chassis. Ensure that the grounding lug and the grounding wire do not interfere with other
device hardware or rack equipment.
185848
1
2
1 NRTL listed 45-degree grounding lug 2 Grounding cable with 0.75 in. of insulation stripped
from the end


Find Your Products By Category
Please Login
