

0
Owner's of the Cisco Systems Switch Cisco Nexus Switch gave it a score of 0 out of 5. Here's how the scores stacked up:


Send document comments to nexus7k-docfeedback@cisco.com
8-5
Cisco Nexus 7000 Series Hardware Installation and Reference Guide
OL-18634-01
Chapter 8 Removal and Installation Procedures
Replacing a Supervisor Module
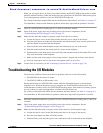
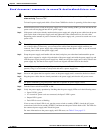
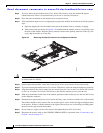
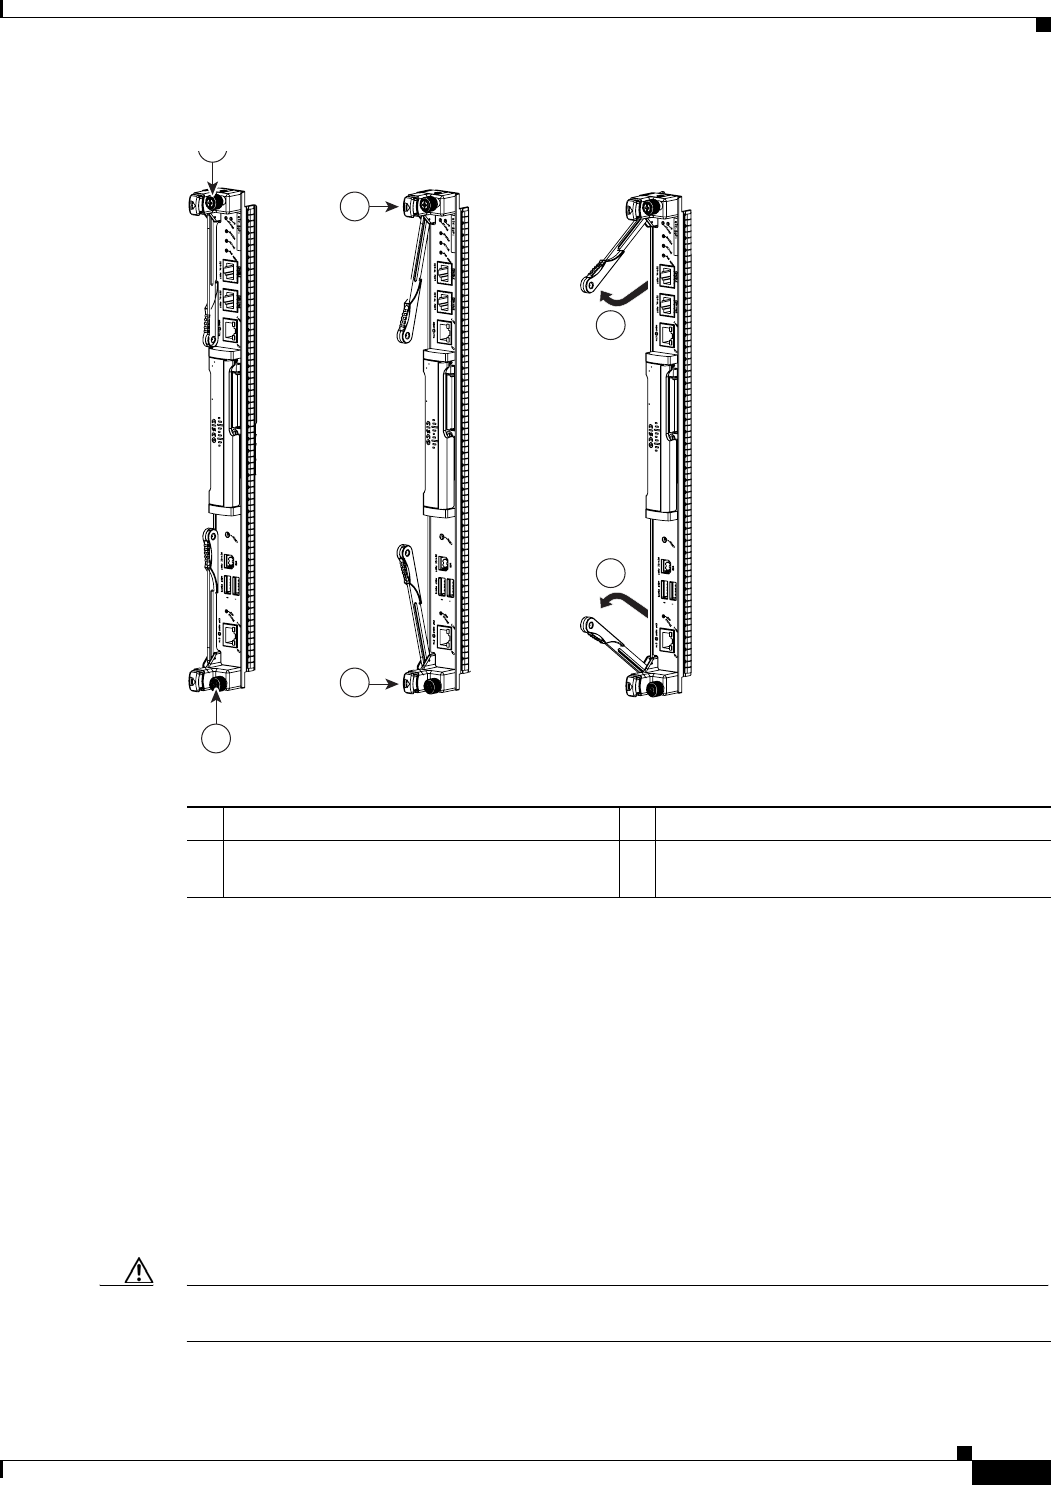
Figure 8-1 Unseating a Supervisor Module
Step 4 Press the ejector release buttons on the top and bottom ends of the module (see View B of Figure 8-1) to
push out the ejector levers and to disconnect the module.
If the chassis has two supervisor modules and you disconnect the active supervisor module, that
supervisor goes into standby mode and the other supervisor automatically becomes the active supervisor.
Step 5 Disconnect all of the cables attached to the front of the module to be removed. Make sure that each cable
is labelled for its port on the module.
Step 6 Simultaneously rotate the two ejector levers outward to unseat the module from the midplane connector
(see View C of
Figure 8-1.
Step 7 With a hand on each ejector, pull the module part way out of its slot in the chassis.
Step 8 Grasp the front edge of the module with your left hand and place your right hand under the lower side
of the module to support its weight. Pull the module out of its slot.
Caution To prevent ESD damage, avoid touching the electronic circuitry and prevent anything else from coming
in contact with the circuitry.
88
1
1
2
2
3
3
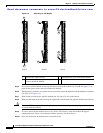
1 Unscrew two captive screws. 2 Simultaneously press both ejector buttons.
3 Simultaneously swing open both ejector
levers to unseat the module.


Find Your Products By Category
Please Login
