

0
Owner's of the Axis Communications Security Camera 2420 W/Lens gave it a score of 0 out of 5. Here's how the scores stacked up:
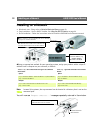


Installing via a Modem AXIS 2420 User’s Manual
16
Refining the Dial-Up Networking Properties
Having created the Dial-Up connection for your AXIS 2420, follow the steps below to
refine the connection properties:
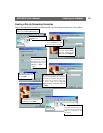
Initiating the Dial-Up Connection
Important!
Please ensure that the Null Modem Cable is correctly installed and that the relative connection proper-
ties are correctly configured before initiating a Dial-Up connection. Step-by-step instructions on how to
do this are provided on the preceding pages of this section.
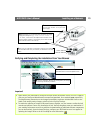
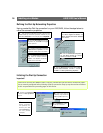
❶ From the Dial-Up Networking dialog, right-click the
dedicated Dial-Up connection previously created for your
AXIS 2420 (AxisCamera in this example). Select Properties.
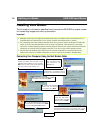
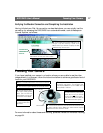
❼ Click the Scripting tab and ensure that the Start
terminal screen minimized checkbox is checked.
Click OK to exit Dial-Up Networking Properties.
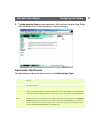
❺ Click TCP/IP settings and then check
the Server assigned IP address, and
Server assigned name server addresses
radio buttons.
❻ Check the Use IP header compression
and Use default gateway on a remote
network checkboxes. Click OK.
❹ In the Allowed network protocols
field, check the TCP/IP checkbox.
NetBEUI and IPX/SPX checkboxes
should remain unchecked.
❷ Click the Server Types tab. From the
drop-down list, select PPP as the Type
of Dial-Up Server.
❸ In the Advanced options field, check
Enable software compression. All other
checkboxes should remain unchecked.
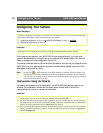
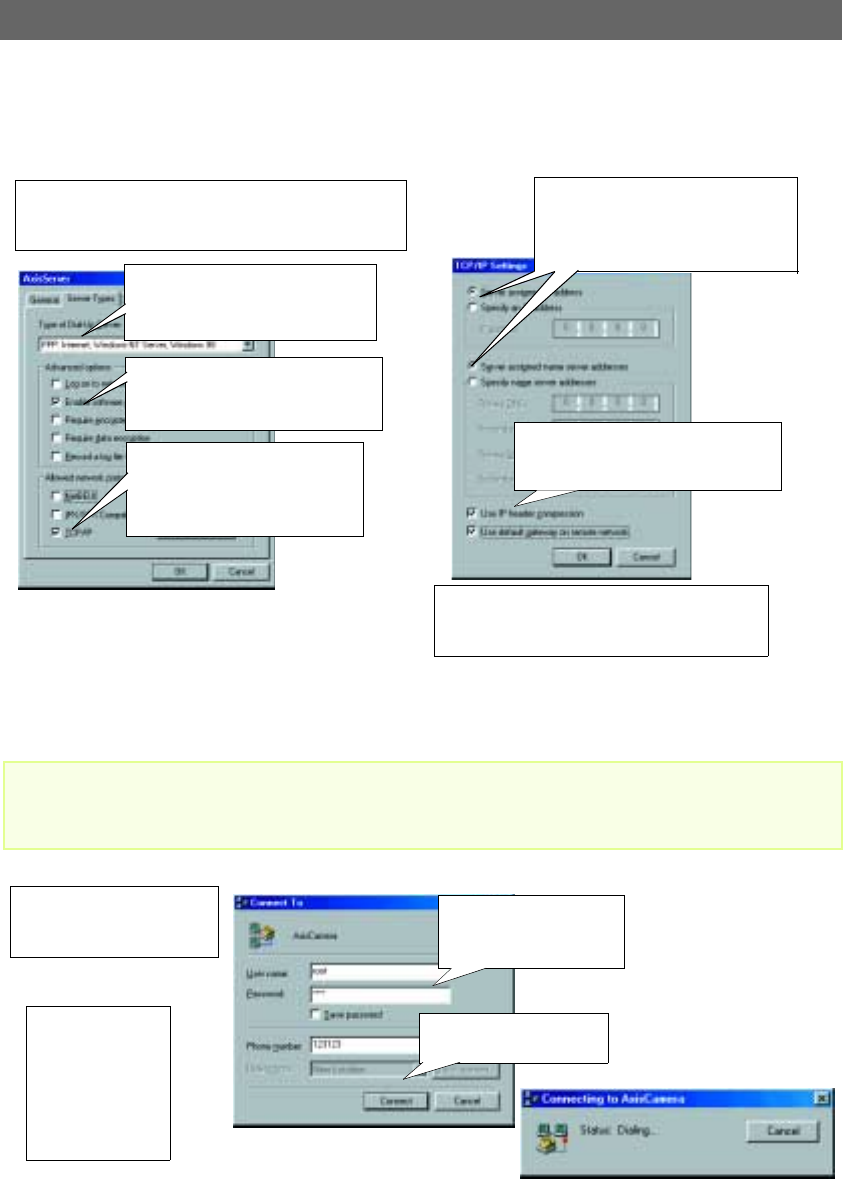
❷ Double-click the
Dial-Up connection
icon previously cre-
ated for your AXIS
2420 (AxisCamera in
this and previous
examples).
❶ Double-click My Computer
and then the Dial-Up Network-
ing icon.
❹ Click Connect to initiate
the Dial-Up connection.
❸ Enter a User name and
Password, using the default
root and pass respectively.


Find Your Products By Category
Please Login
