
0
Owner's of the Axis Communications Security Camera 2420 W/Lens gave it a score of 0 out of 5. Here's how the scores stacked up:

AXIS 2420 User’s Manual Installing on a Network
13
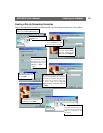
Verifying and Completing the Installation From Your Browser
Important!
• Upon delivery, the AXIS 2420 is configured for open access (anonymous users). The unit is supplied
with one pre-configured Administrator username and password, set to root and pass, respectively.
The Administrator password must be changed immediately to prevent unauthorized access to the
Admin Tools and/or product images, as defined in the Security Settings.
• To enable the updating of images in Microsoft Internet Explorer, set your browser to allow ActiveX
controls and perform a once-only installation of Axis' ActiveX component onto your workstation. If
your working environment restricts or prohibits the downloading of additional software components,
you can alternatively, from the Image Settings, configure your AXIS 2420 to use a Java applet for
updating the images. Refer to the on-line Help for more information.
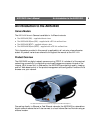
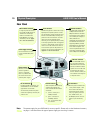
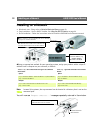
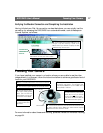
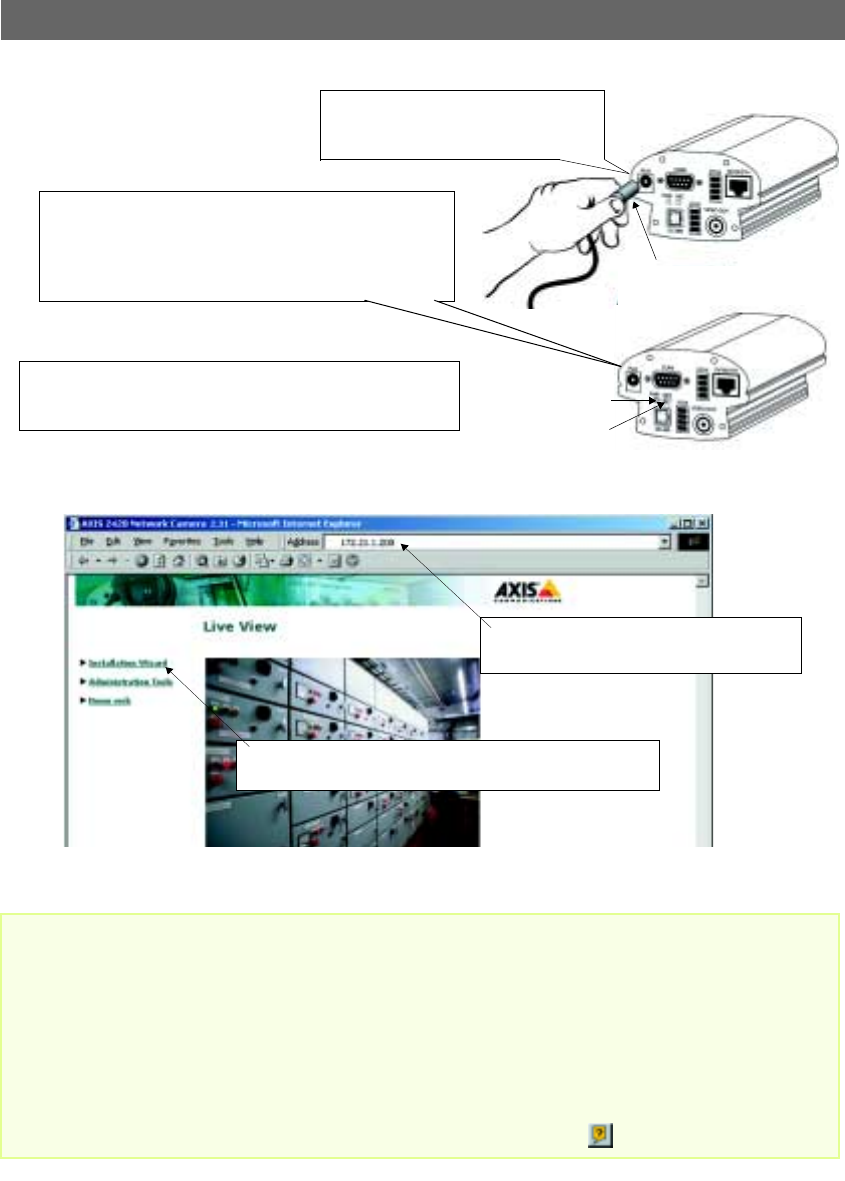
❺ Attach the external Power Supply to
the unit and connect it to your local
mains supply.
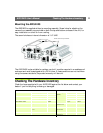
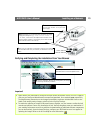
❼ Exit ping. The installation is complete, and you are now ready to
access the AXIS 2420 from your browser, as described in the next
section.
❻ Approximately 10-15 seconds after connecting the power
supply, the message ‘Reply from 172.21.1.200...’
- or similar, is returned in the DOS/command window. Ensure
that the Power Indicator is permanently lit and that the Net-
work Indicator flashes intermittently.
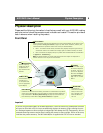
Power Supply
Connector
Power Indicator
Network Indicator
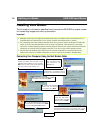
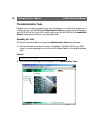
❶ Start your browser and enter the IP address of
your AXIS 2420 in the location/address field.
❷ Click the Installation Wizard. The wizard guides you through
the remaining installation procedures.


Find Your Products By Category
Please Login
