

0
Owner's of the Axis Communications Security Camera 209FD-R gave it a score of 0 out of 5. Here's how the scores stacked up:


14
AXIS 209FD/FD-R/FD-R M12
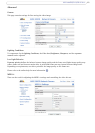
Video Stream
Define the maximum video stream time per session in seconds, minutes or hours. When the set time has
expired, a new stream can be started by refreshing the page in the browser. For unlimited video stream time,
select the Unlimited radio button option. Note that the maximum video stream time does not apply to
clients connecting via multicast.
The fram
e rate allowed to each viewer can also be limited to avoid bandwidth problems on the network. To
allow the highest available frame rate, select the Unlimited radio button option.
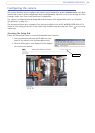
For a preview of the image click Test.
When satisfied with the settings, click Save. Note that the preview
image will be in JPEG format, even though the settings are valid both for Motion JPEG and MPEG-4.
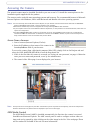
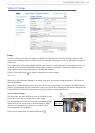
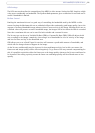
Overlay/Mask
Overlay/Mask Settings
When using an image overlay, select
from the following options:
• U
ploaded image as overlay - usually
used to provide extra information in
the video image.
• Configurable a
reas as privacy masks
- up to three black areas are used to
conceal parts of the video image.
The difference between an overlay and a
privacy mask
is that a privacy mask
cannot be bypassed by accessing the
video stream with the help of the AXIS
HTTP API, whereas an overlay can. After you choose one of these options further options are displayed for
the selected type. See the online help for further information.
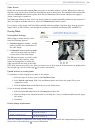
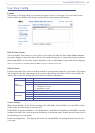
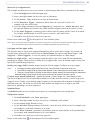
Upload and use an overlay/mask
To upload an overlay image/privacy mask to the camera:
1. Select the type of overlay to use in Overlay/Mask Type.
2.
In the Upload own image field, click the Browse button and locate the image file on your
computer or server.
3. Click the Upload button and follow the on-screen instructions.
To use an already uploaded image:
1. Select an uploaded image from the Use image drop-down list.
2.
Place the image at the required location by entering the x and y coordinates (0,0 being the upper
left corner).
3. Click Save.
Overlay image requirements
There are a number of limitations when using overlay images, such as the size and positioning of images.
Please refer to the online help for more information.
Image Formats Image Size
• Windows 24-bit BMP (full color) The height and width of the overlay image in
pixels
must be divisible by 4.
• Windows 4-bit BMP (16 colors) The height and width of the overlay image in
pixels
must be divisible by 16.
Text, date and
time overlays
Overlay image


Find Your Products By Category
Please Login
