
0
Owner's of the Axis Communications Security Camera 209MFD gave it a score of 0 out of 5. Here's how the scores stacked up:


26
AXIS 209MFD/MFD-R/MFD-R M12
Camera Tampering
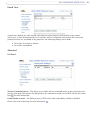
The camera tampering application generates an alarm whenever the camera is repositioned, or when the
lens is covered, sprayed or severely put out of focus.
The Minimum duration parameter defines
the time between the tampering and the alarm. This helps prevent
false alarms.
Check the Alarm for dark images box if
there should be an alarm when the camera lens is sprayed and the
image is dark.
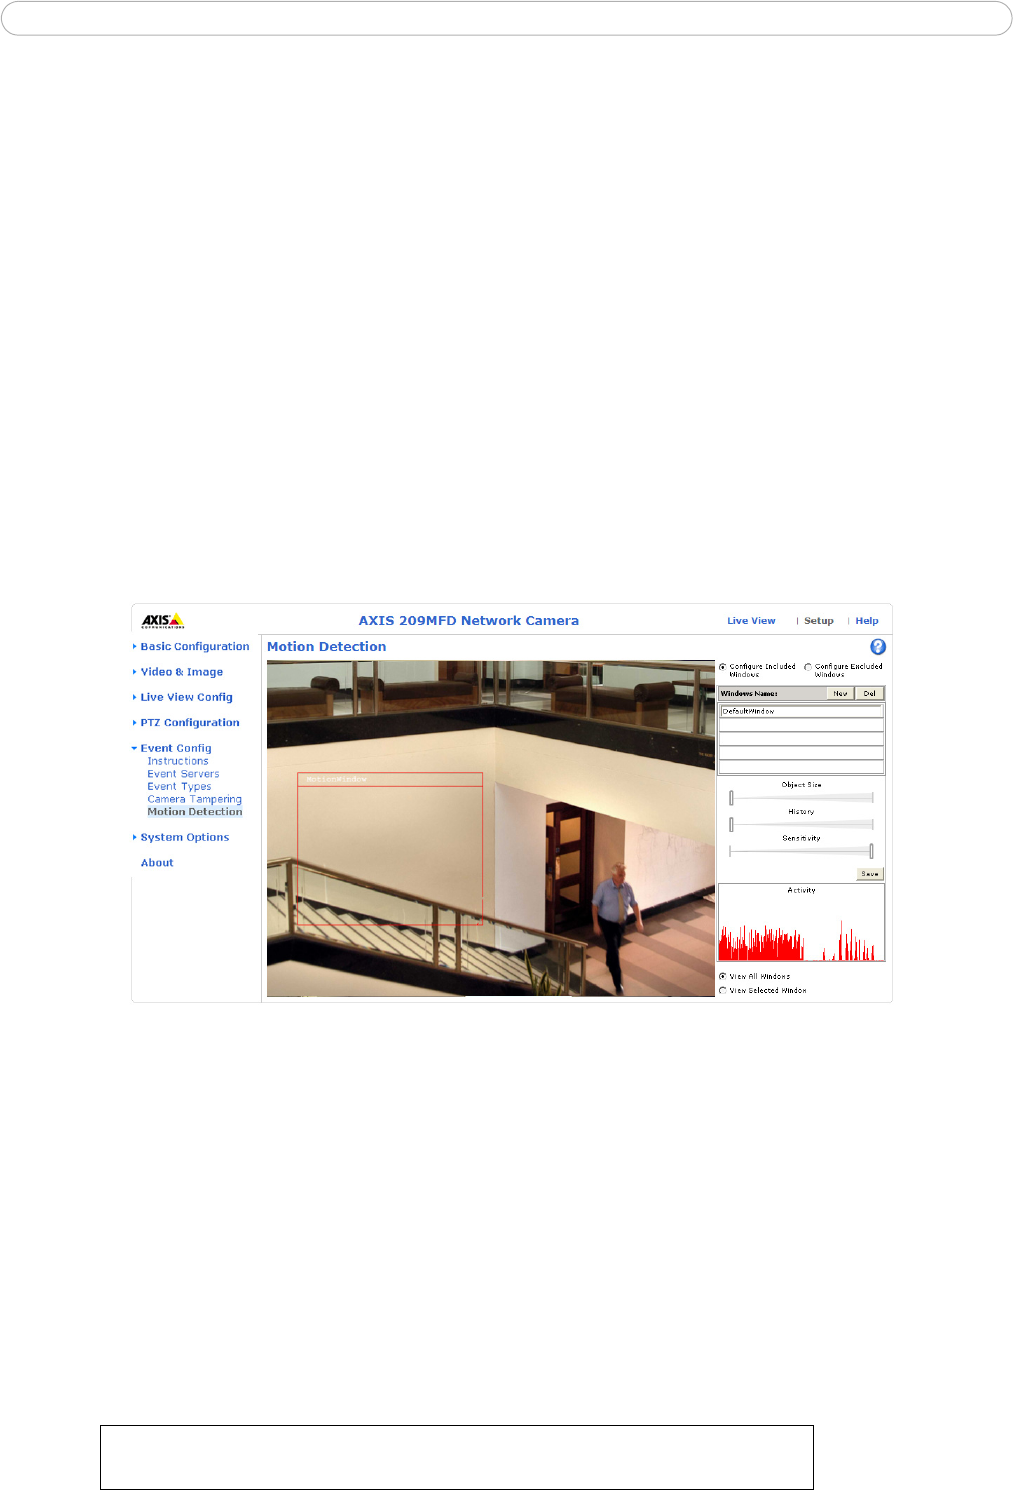
Motion Detection
Motion detection is used to generate an alarm whenever movement occurs (or stops) in the video image. A
total of 10 Include and/or Exclude windows can be configured.
• Included window
s target specific areas within the whole video image
• Ex
cluded windows define areas within an Include window that should be ignored (areas outside
Include windows are automatically ignored)
Once configured, the motion detection windows appear in the list of available triggers, for triggering events.
Se
e How to set up a triggered event above.
Note:
Using the motion detection feature may decrease the camera’s overall performance.
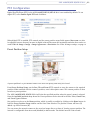
Configuring Motion Detection
1. Click Motion Detection in the Event Config menu.
2. Click New against Windows Name.
3. Select the Include or Exclude option to define an Include or Exclude window, and enter a
descriptive name in the field below.
4. Click Save.
5. Adjust the size (drag the bottom right-hand corner) and position (click on the text at the top and
drag to the desired position).
6. Adjust the Object Size, History and Sensitivity profile sliders (see table below for details). Any
detected motion within an active window is then indicated by red peaks in the Activity window
(the active window has a red frame).
7. Click Save..
To exclude parts of the Include window, click the Configure Excluded Windows button
and position the Exclude window as required, within the Include window.


Find Your Products By Category
Please Login
