
0
Owner's of the 3Com Gas Grill Utility Cart gave it a score of 0 out of 5. Here's how the scores stacked up:


4
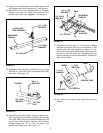
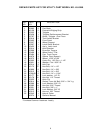
FIGURE 6
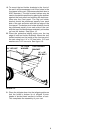
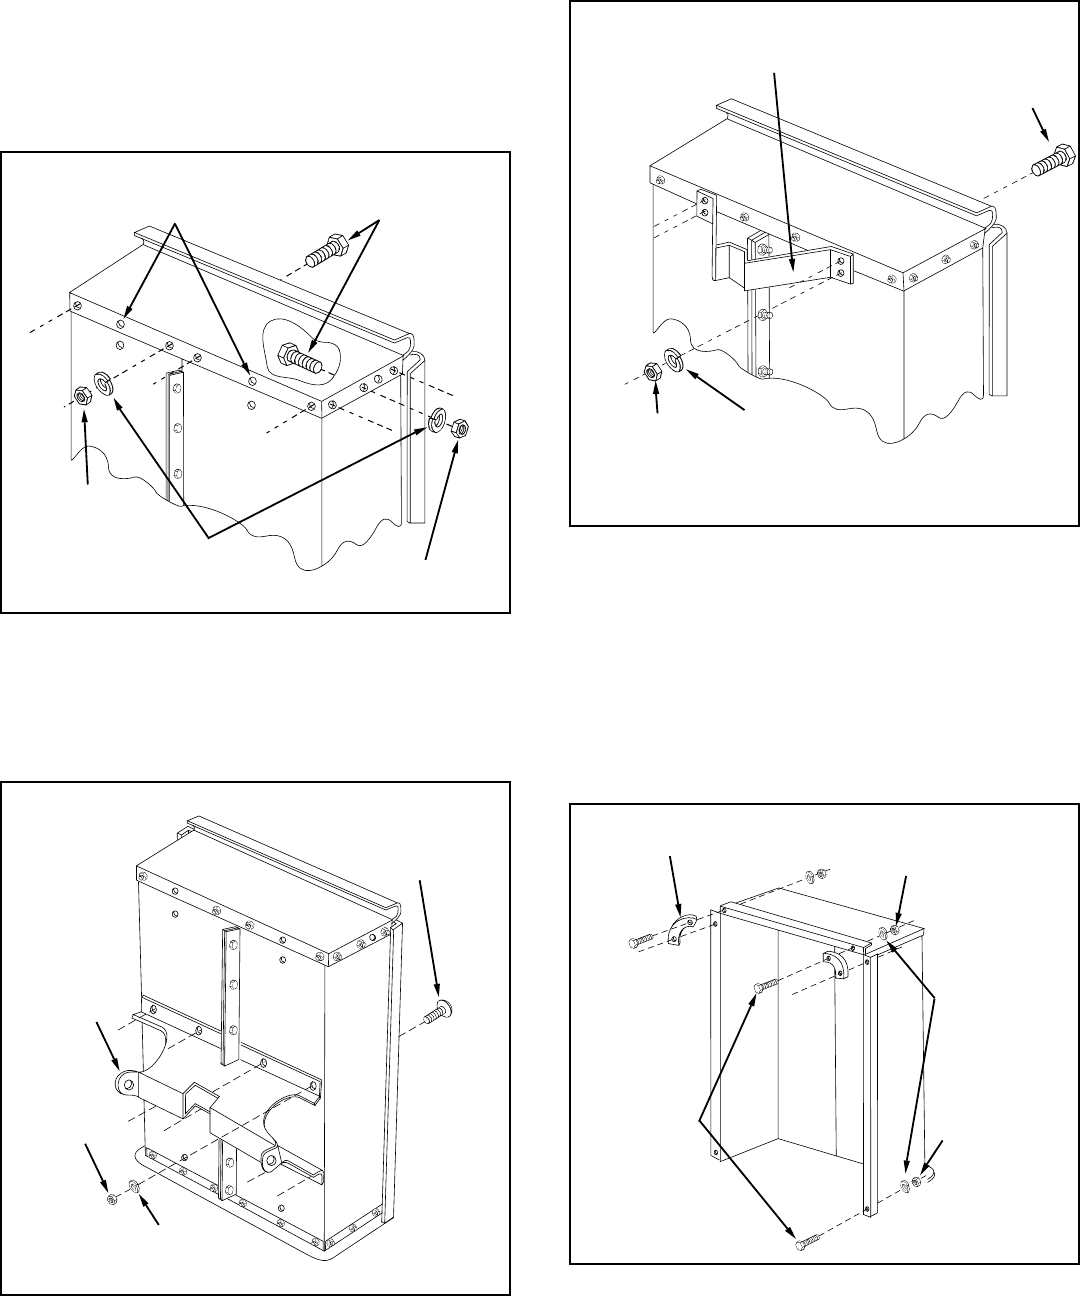
11. Assemble latch stand bracket using four 1/4" x
5/8" hex bolts, 1/4" lock washers and 1/4" hex
nuts. See figure 7. TIGHTEN.
FIGURE 7
1/4" x 5/8"
HEX BOLT
LATCH STAND BRACKET
1/4" LOCK
WASHER
1/4" HEX NUT
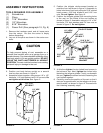
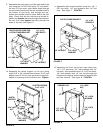
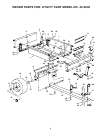
9. Assemble the front panel over the open end of the
cart using ten 1/4"x1/2" hex bolts, 1/4" lock wash-
ers and 1/4' hex nuts. Insert bolts down through
the two middle holes and the two outside holes in
the bottom of cart body, and through the top,
bottom and middle holes on each side of the cart
body. Check that the cart halves are butted to-
gether and tighten the bolts through the bottom of
the cart first; then tighten the bolts through the
sides of the cart. See figure 5.
10. Assemble the wheel support to the cart using
eight 5/16" x 3/4" slotted head screws, 5/16" lock
washers and 5/16" hex nuts as shown in figure 6.
Heads of screws go to the inside of cart. Tighten.
FIGURE 5
12. Assemble two front top corner caps using four
1/4" x 1/2" hex bolts, 1/4" lock washers and 1/4"
hex nuts. Also assemble two 1/4" x 1/2" hex bolts,
1/4" lock washers and 1/4" hex nuts through top
flanges and tailgate reinforcement bracket at the
two rear corners. See figure 8. TIGHTEN.
FIGURE 8
CORNER CAP
1/4" x 1/2"
HEX BOLT
1/4" LOCK
WASHER
1/4" LOCK
NUT
1/4" LOCK
NUT
1/4" x 1/2"
HEX BOLTS
1/4" LOCK
WASHER
1/4" HEX NUT
1/4" HEX NUT
LEAVE HOLES OPEN FOR
LATCH STAND BRACKET
5/16" LOCK
WASHER
5/16" HEX
NUT
SLOTTED SCREW
5/16" x 3/4"
WHEEL
SUPPORT


Find Your Products By Category
Please Login
