
0
Owner's of the 3Com Gas Grill Utility Cart gave it a score of 0 out of 5. Here's how the scores stacked up:


3
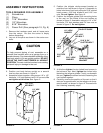
ASSEMBLY INSTRUCTIONS
TOOLS REQUIRED FOR ASSEMBLY
(1) Screwdriver
(1) Pliers
(2) 7/16" Wrenches
(2) 1/2" Wrenches
(2) 9/16" Wrenches
(1) Power Drill (See paragraph 19, Pg. 6)
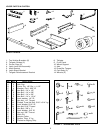
1. Remove the hardware pack and all loose parts
from the carton. Be sure the carton is empty
before discarding.
2. Lay out all the parts as shown in the carton con-
tents.
CAUTION
To help prevent tipping of cart, assemble on a
smooth level surface such as a garage floor or a
paved driveway. Pay close attention to stability of the
cart body when it is in an upright position. DO NOT
LEAVE THE CART UNATTENDED IN UPRIGHT
POSITION. The cart could be knocked over causing
personal injury or damage to the cart.
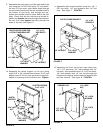
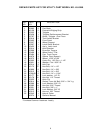
3. Position cart body halves upright on a smooth
level surface as shown in figure 2.
4. Assemble halves together using seven 1/4" x 1/2"
hex bolts, 1/4" lock washers and 1/4" hex nuts. Do
not tighten at this time. See figure 2.
.
1/4" x 1/2"
HEX BOLT
1/4" LOCK
WASHER
1/4" HEX
NUT
FIGURE 2
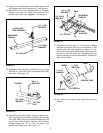
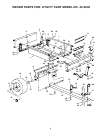
5. Position the tailgate reinforcement bracket on
outside of cart as shown in figure 3. Assemble to
holes in bottom of cart body using six 5/16" slotted
head screws, 5/16"lock washers and 5/16" hex
nuts. Do not tighten. See figure 3.
6. Position the tailgate guides (with mounting holes
to the rear) on the inside of the cart bodies as
shown in figure 3. Assemble using six 1/4" x 3/4"
hex bolts, 1/4" lock washers and 1/4" hex nuts as
shown in figure 3. Do not tighten.
FIGURE 3
1/4" x 3/4"
HEX BOLT
1/4" LOCK
WASHER
5/16" X 3/4"
SLOTTED BOLT
5/16" LOCK
WASHER
5/16" HEX
NUT
1/4"
HEX
NUT
TAILGATE
REINFORCEMENT
BRACKET
TAILGATE GUIDE
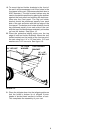
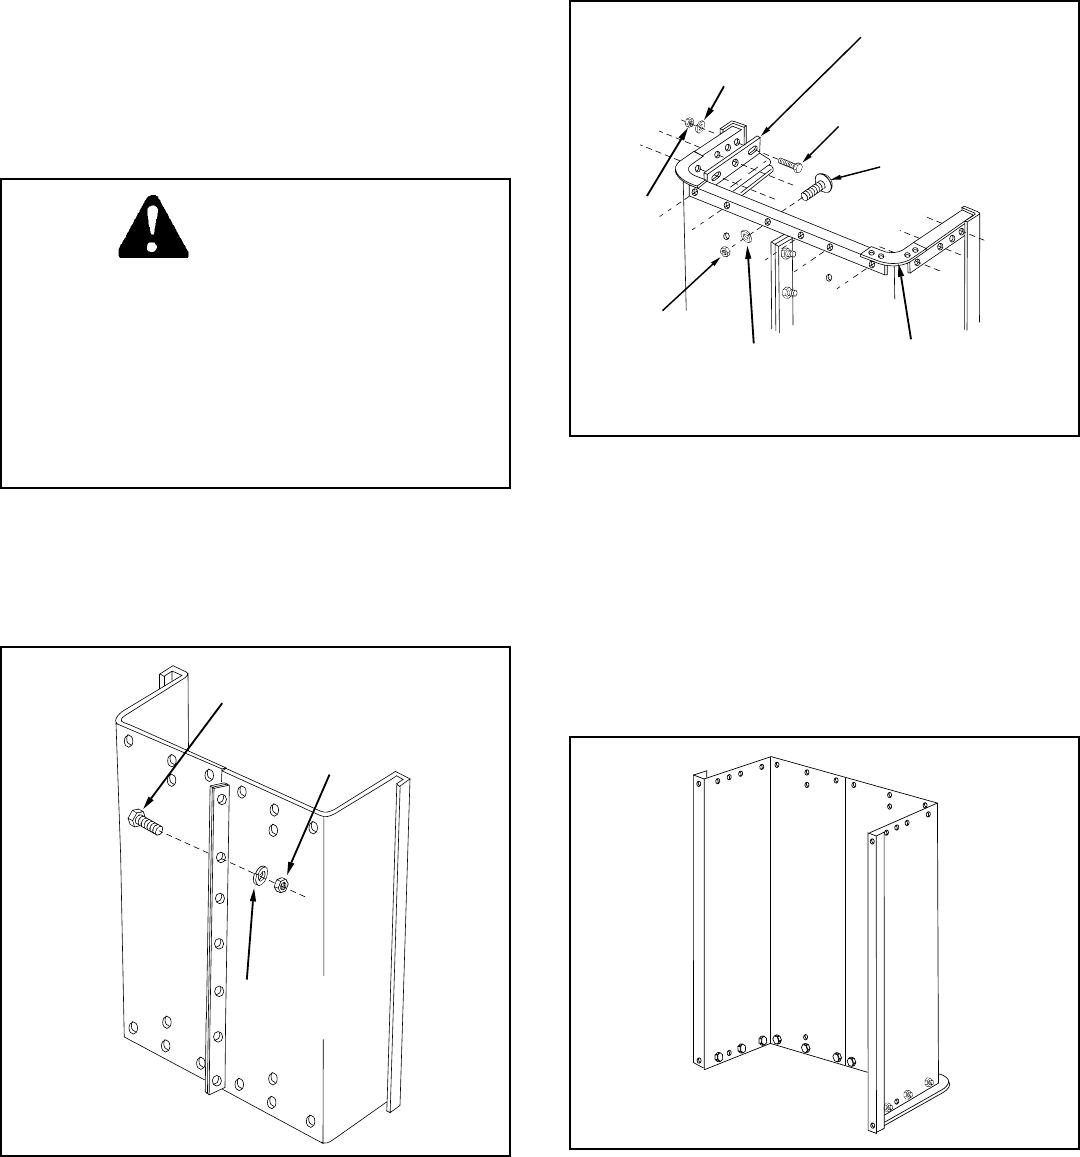
FIGURE 4
7. At this time tighten the six slotted head screws in
the bottom of cart. Next, tighten the six hex bolts
fastening the tailgate guides. Finally, underneath
the cart, tighten the seven hex bolts fastening the
cart bodies together.
8. Carefully reverse the position of the cart so that it
rests on its opposite end, on the tailgate reinforce-
ment bracket, as shown in figure 4. Proceed with
the following assembly steps.


Find Your Products By Category
Please Login
