
0
Owner's of the Axis Communications Security Camera 209FD/FD-R gave it a score of 0 out of 5. Here's how the scores stacked up:


29
AXIS 209FD/FD-R
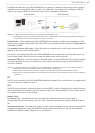
UPnP™
The camera includes support for UPnP™, which is enabled by default. If also enabled on your computer, the
camera will automatically be detected and a new icon will be added to “My Network Places.”
Note:
UPnP must also be enabled on your Windows XP or ME computer. To do this, open the Control Panel from the Start Menu and
select Add/Remove Programs. Select Add/Remove Windows Components and open the Networking Services section. Click
Details and then select UPnP as the service to add.
RTP / MPEG-4
These settings are the port range, IP address, port number (video and audio), and Time-To-Live value to use
for the video stream(s) in multicast MPEG-4 format. Only certain IP addresses and port numbers should be
used for multicast streams. For more information, please see the online help.
Bonjour
The AXIS 209FD/FD-R includes support for Bonjour. When enabled, the camera is automatically detected
by operating systems and clients that support this.
LED Settings
The Status indicator LED on the camera can be set to flash at a configurable interval (or to not light up at
all) whenever the unit is accessed. For a listing of all LED behavior, see page 7, or the online help. Note that
the LED does not flash when the stream i
s retrieved using MPEG-4 multicast.
Maintenance
• Restart - The camera is restarted without changing any of the settings.
• Restore - The
unit is restarted and most current settings are reset to factory default values. The settings
that will not be reset are as follows:
• the boot protocol (DHCP or static)
•
the static IP address
• the default router
•the subnet mask
•Default - The
default button should be used with caution. Pressing this will return all of the camera's
settings to the factory default values (including the IP address)
Upgrade Server -
See Upgrading the firmware, on page 32.
Backup -
To take a backup of all of the parameters, and any user-defined scripts, click this button. If
necessary, it will then be possible to return to the previous settings, if settings are changed and there is
unexpected behavior.
Restore - cli
ck the Browse button to locate the saved backup file (see above) and then click the Restore
button. The settings will be restored to the previous configuration.
Note:
Backup and Restore can only be used on the same unit running the same firmware. This feature is not intended for the configu-
ration of multiple units or for firmware upgrades.
Support
Support Overview
The su
pport overview page provides valuable information on troubleshooting and contact information,
should you require technical assistance.
System Overview
System Overview -
page provides a quick look over the current network, security, event and camera
settings.


Find Your Products By Category
Please Login
