
0
Owner's of the Axis Communications Security Camera AXIS gave it a score of 0 out of 5. Here's how the scores stacked up:


Page 4 AXIS 206/206M Quick Installation Guide
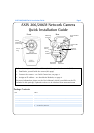
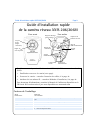
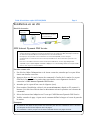
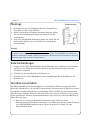
Mounting
1. If required, use the 3 supplied screws to fix the base plate to a
flat surface.
2. To use the shorter stand, unscrew the lock ring to release the
camera, and remove the extension section.
3. Re-attach the camera, adjust the angle and gently tighten the
lock ring.
Important!
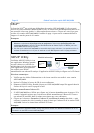
Cable Connections
1. Using the self-adhesive strip, attach the supplied cable clip to the rear panel and fasten the
power cable to it. This will prevent accidental cable disconnection.
2. Connect the power adapter to the camera.
3. Connect the AXIS 206/206M to the network using a standard RJ-45 network cable.
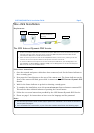
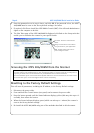
Installation Methods
The AXIS 206/206M is designed for installation on an Ethernet network. This involves
assigning it an IP address, automatically (via e.g. DHCP) or manually. Several installation
methods are available. The one to use depends on how your network is configured. If unsure of
the method to use, please consult your network administrator, or see the documentation for
your network.
• If you are using e.g. a home broadband router, you may find it convenient to view the router’s
administration pages to discover which IP address has been assigned to your AXIS 206/206M.
Please consult the router’s documentation for further information.
• If your network has an Internet connection (with no HTTP proxy) and uses a DHCP server to
assign IP addresses, use the One-Click installation procedure. See page 5.
• If your network uses automatic IP addressing (DHCP) and your computer uses the UPnP
TM
service, the AXIS 206/206M will automatically be detected and displayed on your screen. See
page 6 for more information.
•Use the AXIS IP Utility (see page 6) to discover the IP address. This can also be used to set the
IP addess manually.
• Set the IP address manually with the ARP/Ping method, as described on page 7.
The AXIS 206/206M is designed for indoor use only, and must always be positioned where it is not exposed
to direct sunlight or strong halogen light, which can cause permanent damage to the camera’s image sen-
sor. Damage as a result of exposure to strong light is not covered by the Axis warranty.
Lock ring
Wall mounting


Find Your Products By Category
Please Login
