

0
Owner's of the American DJ DJ Equipment DJ Scan gave it a score of 0 out of 5. Here's how the scores stacked up:

American DJ® - www.americandj.com - DJ Scan 250 EX™ Instruction Manual Page 13 American DJ® - www.americandj.com - DJ Scan 250 EX™ Instruction Manual Page 14
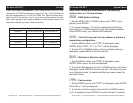
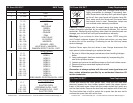
DJ Scan 250 EX™ DMX Traits
Channel Value Function
1 0 - 255 PAN
2 0 - 255 TILT
3 COLOR WHEEL
0 - 10 WHITE
11 - 21 RED
22 - 32 DEEP BLUE
33 - 43 GREEN
44 - 54 YELLOW
55 - 65 ORANGE
66 - 76 PINK
77 - 87 LIGHT BLUE
88 - 98 UV PURPLE
99 - 109 MAGENTA
110 - 120 ORANGE + RED
121 - 127 LIGHT BLUE + MAGENTA
128 - 255 RAINBOW EFFECT SLOW - FAST
4 GOBO WHEEL
0 - 11 OPEN
12 - 23 GOBO 1
24 - 35 GOBO 2
36 - 47 GOBO 3
48 - 59 GOBO 4
60 - 71 GOBO 5
72 - 83 GOBO 6
84 - 95 GOBO 7
96 - 107 GOBO 8
108 - 119 GOBO 9
120 - 127 GOBO 10
GOBO WHEEL ROTATION SLOW - FAST
5 SHUTTER/STROBE
0 - 7 BLACKOUT
8 - 15 SHUTTER OPEN
16 - 131 STROBING SLOW - FAST
132 - 247 GOBO SHAKE SLOW - FAST
248 - 255 SHUTTER OPEN
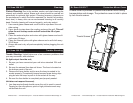
DJ Scan 250 EX™ Fuse Replacement
DJ Scan 250 EX™ Lamp Replacement
Caution: Always replace with the exact same type lamp and fuse,
unless otherwise specified by an authorized American DJ® service
technician. Replacing with anything other than the specified part can
damage your unit and will void your manufactures warranty.
Warning: If you continue to blow lamps or fuses, STOP using the
unit. Contact customer support for further instructions, you may have
to return the unit for servicing. Continuing to use the unit may cause
serious damage.
Caution! Never open the unit when in use. Always disconnect the
main power before attempting to replace the lamp.
1. Be sure to follow the proper procedures when handling halogen
bulbs.
2. Lamp replacement has been made simple by incorporating the
use of two phillips screws.
3. Loosen and remove the phillips screws on the front bottom cover.
4. Remove the lamp cover and replace the bulb.
5. Reassemble.
Remember to always replace with the exact same type lamp and
fuse, unless otherwise specified by an authorized American DJ
service technician.
Locate and remove the unit’s power cord. Once the cord has been
removed located the fuse holder located inside the power socket.
Insert a flat-head screw driver into the power socket and gently pry
out the fuse holder. Remove the bad fuse and replace with a new one.
The fuse holder has a built-in socket for a spare fuse be sure not to
confuse the spare fuse with active fuse.
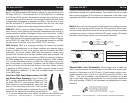
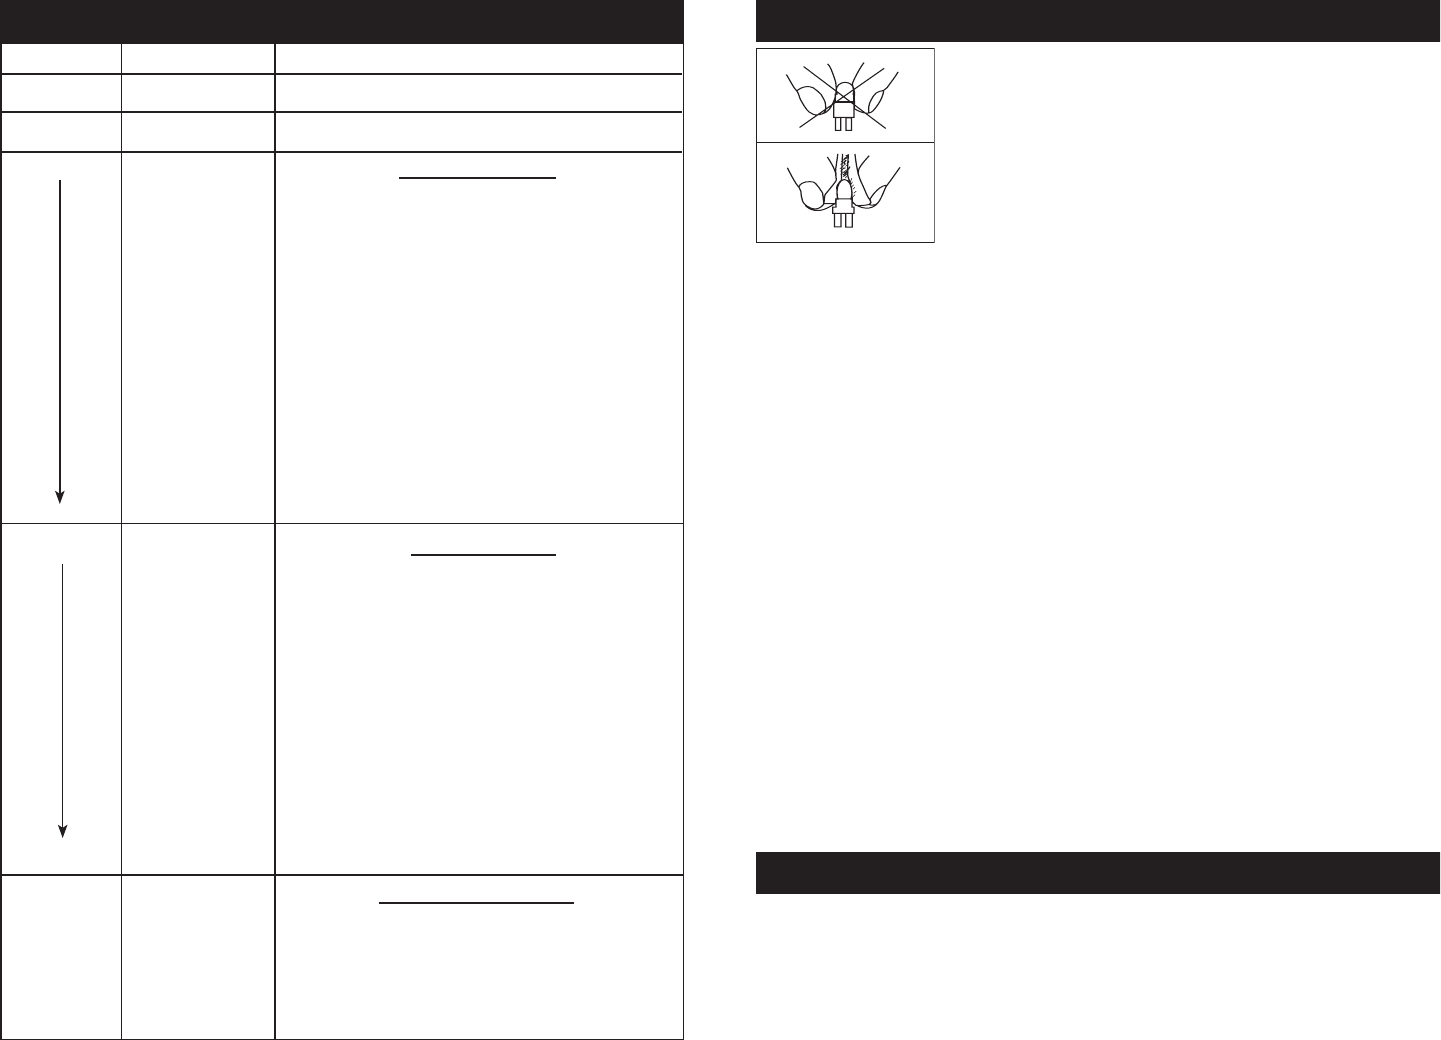
This fixture is fitted with a halogen lamp which is
highly susceptible to damage if improperly han-
dled. Never touch the lamp with your bare fingers
as the oil from your hands will shorten lamp life.
Also, never move the fixture until the lamps have
had ample time to cool. Remember, lamps are
not covered under warranty conditions.


Find Your Products By Category
Please Login
