
0
Owner's of the 2Wire Coffeemaker ThermalVision PRO SW gave it a score of 0 out of 5. Here's how the scores stacked up:


#ThermalVision™ PRO SW
ND-7609-3UK Page 3 of 21
1. Installing the ThermalVision™ PRO series software onto a PC.
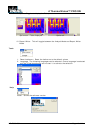
To install the ThermalVision™ PRO software onto a PC:
1. Insert the CD into the PC.
2. Use Windows Explorer to view the files on the CD.
3. Open and run the file “ThermalVision PRO PC setup.exe”.
4. This will install the software on to the PC.
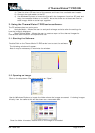
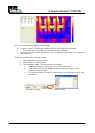
Once the software has successfully been installed an
icon appears on the PC Desktop.
2. Transferring saved images from the 61-846 or 61-848 camera to the
PC.
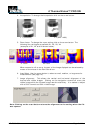
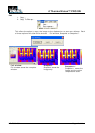
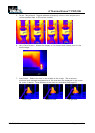
In the camera the images are saved on a micro-SD card and are in folders. A new folder is
created every time the camera is switched on. The folder also contains the voice message file
if it is recorded. Each saved image will therefore consist of two or three files.
a. A BMP file containing the thermal and visual image.
b. An IR5 file containing the temperature data.
c. A WAV file if a voice recording was made when the image was saved.
Note: Do not use the Microsoft Scanner and Camera Wizard to download images.
Use Windows Explorer.
There are two ways to transfer images to the PC.
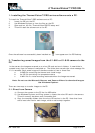
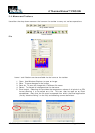
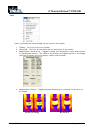
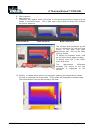
2.1. Direct from Camera
a) Connect the camera to the PC via the USB cable.
b) Use Windows Explorer and filing system to locate the micro-SD card in the camera.
This will normally be shown as a removable disk.
c) Copy the complete folders from the micro-SD card on to the PC. Note that there
are at least two files for each image, which must be kept together.


Find Your Products By Category
Please Login
