
4.0
Owner's of the KitchenAid Waffle Iron KPWB100OB gave it a score of 4.0 out of 5. Here's how the scores stacked up:


6
13. Be sure the timer start and timer reset button covers align
with contact points on control board.
14. Be sure the LED lens and digital display line up with holes in
bezel.
15. Using thumbs, press control PCB board until it clamps
securely into cradle.
16. Reassemble the ferrite bead fastener with one Phillips screw.
Be sure 5-pin connector is securely connected to power
supply PCB. Reassemble base to cradle.
Button Replacement
There are three (3) push buttons on the control bezel: power
on/off, timer start and timer reset:
1. Unplug the waffl e baker.
2. Remove the base; see Component Access.
3. Remove one screw from the ferrite bead fastener.
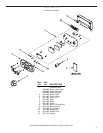
2. Using thumbs, push down on control PCB board (located in
cradle arm) until clamps release.(See Figure 1)
3. Place tape over button front. This will help prevent losing the
button’s small spring.
4. Reach inside the waffl e baker cradle and grasp the button
cover sleeve with needle nose pliers. Pull straight back to
release the sleeve.
5. Remove tape and pull out button cover and shaft from bezel,
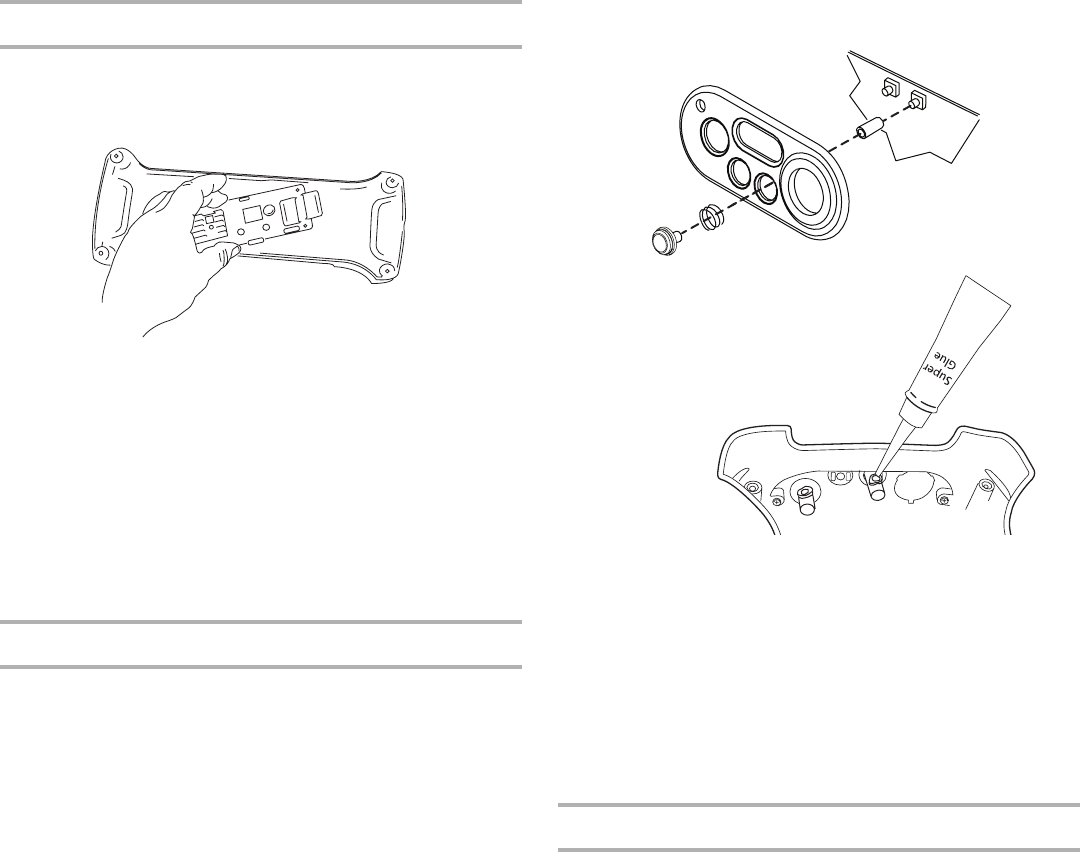
being careful not to lose small spring.
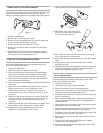
6. Insert new button shaft through bezel hole. Be sure spring is
between button top and outer bezel. (See Figure 6)
7. Slide button cover over shaft. Add a small drop of super glue
or solder into the cover hole. (See Figure 7)
8. Be sure button cover lines up with contact point on control
PCB board.
9. Using thumbs, press control PCB board until it clamps
securely into cradle. Reassemble.
10. Check each button and the timer adjustment knob to make
sure each works properly.
Figure 6
Figure 7
CONTROL PCB BOARD REPLACEMENT
The control board regulates the light, timer and power on/off
button. It is located in the cradle.
1. Unplug the waffl e baker.
2. Remove the base; see Component Access.
3. Remove one Phillips screw from the ferrite bead fastener.
Then remove the white, 5-pin connector from the power
PCB. This will allow for easy access to the control PCB.
4. Remove the timer adjustment knob; see Timer Adjustment
Knob Replacement instructions.
5. Remove the start and reset buttons; see Button Replacement
instructions.
6. Remove the control PCB from the cradle. Remove (4) four
Phillips screws from the control PCB plastic cover.
7. Remove three (3) white pin connectors from bottom of
control board; two (2), 2-pin connectors and one (1), 5-pin
connector.
8. Replace the old control PCB with the new control PCB. Be
sure three white (3) pin connectors are connected securely
to board; two (2), 2-pin connectors and one (1), 5-pin
connector.
9. Reassemble with new control PCB board to the plastic cover
with 4 Phillips screws. Slide control board into cradle.
10. Reassemble the timer adjustment knob; see Timer
Adjustment Knob Replacement instructions.
12. Slide button cover over shaft. Add a
small drop of super glue or solder into
the cover hole. (See Figure 7)
11. Insert button shaft through bezel hole. Be sure spring is
between button top and outer bezel. (See Figure 6)
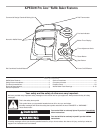
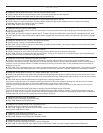
POWER SUPPLY PCB REPLACEMENT
The power supply printed circuit board (PCB) provides DC voltage
to power the control PCB located in the cradle arm and AC
voltage to the heating elements in the waffl e plates. (See Figure 5)
1. Unplug the waffl e baker.
2. Remove base; see Component Access.
3. Remove six (6) blue-capped black and white AC leads from
the power supply PCB located in the base.
4. Remove white, 5-pin connector from the PCB.
5. Remove four (4) Phillips screws from PCB; remove board
from base.
6. Reassemble with new board. Be sure six (6) blue-capped
leads and white 5-pin connector are connected securely in
their proper positions. Replace base cover.
Figure 5


Find Your Products By Category
Please Login
