
4.0
Owner's of the KitchenAid Waffle Iron KPWB100OB gave it a score of 4.0 out of 5. Here's how the scores stacked up:


5
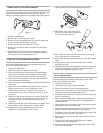
3. Remove two (2) Phillips screws and lift metal cover.
4. Replace the dial thermometer and reassemble. (See Figure 3)
RUBBER FEET REPLACEMENT
Check the four (4) rubber feet on the bottom of the waffl e baker
when servicing.
1. Remove the screw from each foot.
2. Remove each rubber foot and replace.
Figure 2
Figure 3
Figure 4
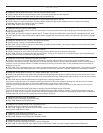
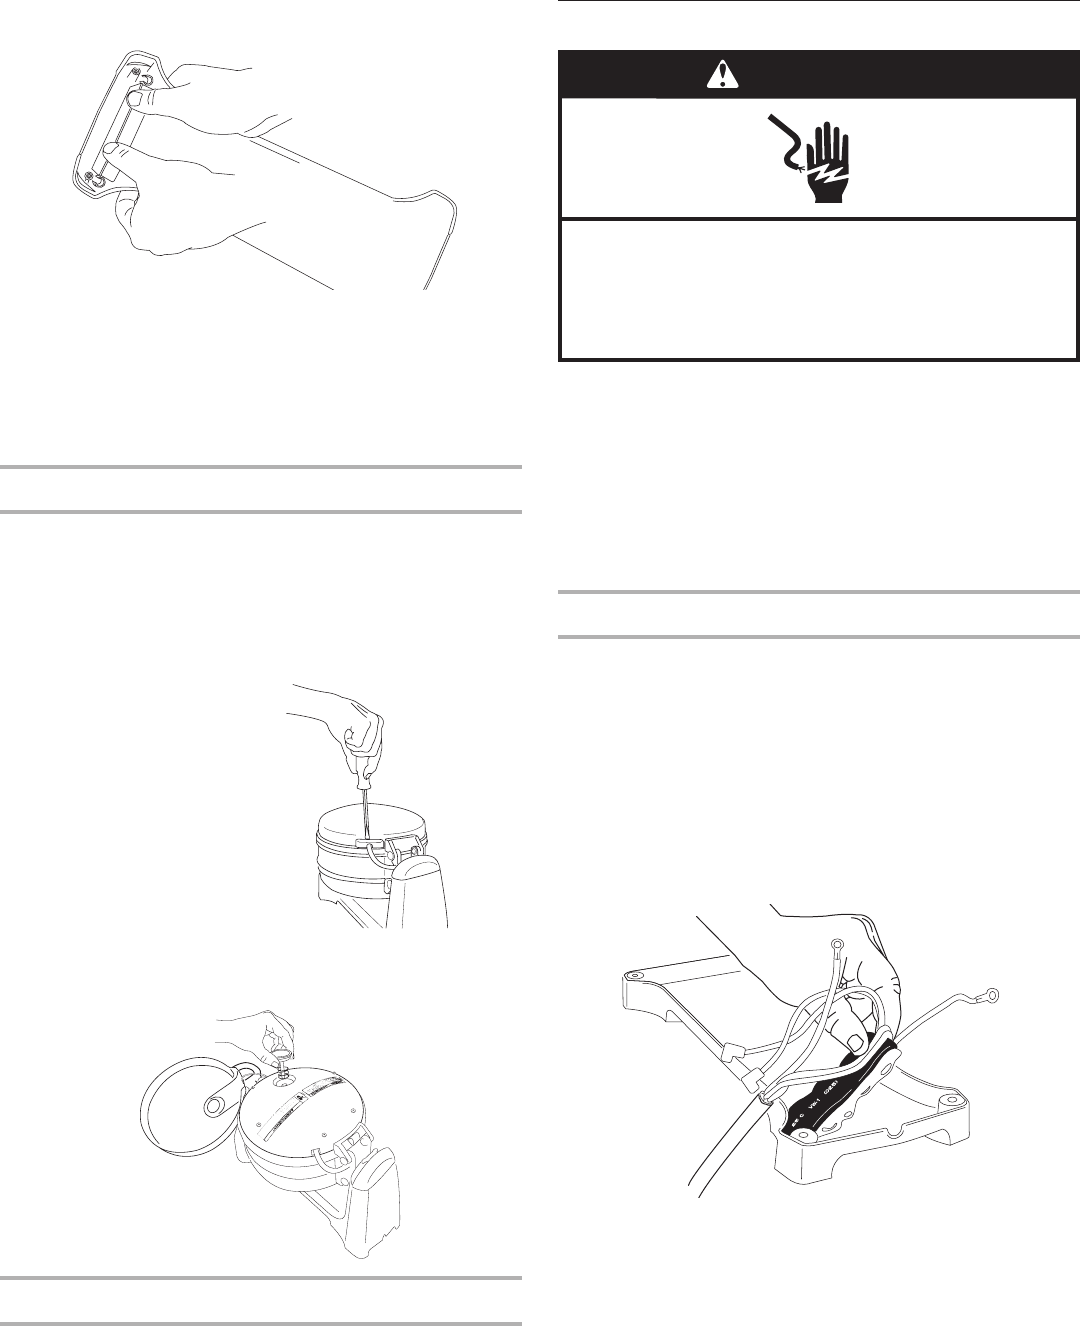
6. Remove MOV power board and cord assembly.
7. Hot glue new MOV board to base. Reassemble leads. Be
sure that the green lead terminals are connected securely to
ground lug. Be sure AC leads are connected securely to PCB.
The black lead goes to the ACL terminal and the white lead
goes to the ACN terminal.
Figure 1
POWER CORD REPLACEMENT
Do not run the waffl e baker if the power cord is damaged.
Replace with a new cord assembly immediately.
1. Unplug the waffl e baker.
2. Remove base, see Component Access.
3. Remove two (2) Phillips screws from power cord wire clamp.
4. Remove the power cord ground wire terminal (green) and the
MOV board ground wire terminal from the ground lug.
5. Remove two (2) power cord MOV blue-capped AC leads [one
(1) black and one (1) white] from printed circuit board (PCB)
located on base. (See Figure 4)
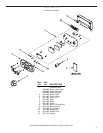
DIAL THERMOSTAT REPLACEMENT
A properly working dial thermometer will indicate:
■ Cool Temperature – ambient temperature
■ Preheat Temperature – ambient temperature to 350º F
■ Ready – 350º F
If the dial thermometer is warped or the needle does not move
to indicate waffl e plate temperature changes, replace the dial
thermometer.
1. Unplug the waffl e baker.
2. Remove black screw
cover located left of the
unit’s top hinge. (See Figure 2)
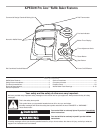
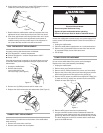
Component Access
Access the waffl e baker’s power supply cord, power supply PCB
board, control PCB board and button covers from the bottom of
the unit.
1. Unplug the waffl e baker.
2. Place the waffl e baker upside down on a cushioned surface.
3. Remove four (4) recessed Phillips screws from feet and two
(2) recessed Phillips screws from base cover.
4. Lift off base.
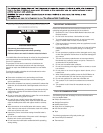
WARNING
Electrical Shock Hazard
Disconnect power before servicing.
Replace all parts and panels before operating.
Failure to do so can result in death or electrical shock.
6. Using thumbs, push down on control PCB board (located in
cradle arm) until clamps release. (See Figure 1).
7. Reach inside the waffl e baker cradle and squeeze the timer
adjustment knob’s three slips and pull out knob from bezel.
8. Push timer adjustment knob through bezel hole until it locks
into place. Be sure the timer adjustment knob location is
rotated correctly with the control board. If the alignment is
not correct the Max and Min time will be incorrect.


Find Your Products By Category
Please Login
